
If you're a coffee enthusiast like me, you know that steaming milk is a crucial part of making a perfect cup of coffee. When it comes to steaming milk, having the right equipment is essential, and the Breville Barista Express is a fantastic choice. This machine is not only versatile but also easy to use, even for beginners. In this article, I will share my experience and guide you step-by-step on how to steam milk on the Breville Barista Express to create the perfect foam for your favorite lattes, cappuccinos, and more.
Getting Familiar with the Breville Barista Express Milk Steaming Features
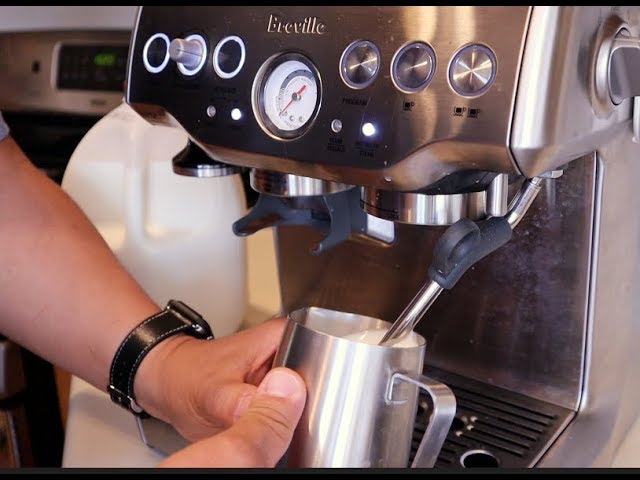
Before we dive into the process of steaming milk, let's take a moment to understand what makes the Breville Barista Express stand out when it comes to frothing and steaming milk. The Breville Barista Express comes with a steam wand that allows you to create silky smooth milk foam with precision and control. The steam wand is easy to handle, and with a little practice, you’ll be able to create microfoam for your drinks.
The steam wand has two settings: the automatic milk frothing function and the manual steam wand. While the automatic function is great for beginners, I prefer using the manual steam wand to have full control over the milk’s texture and temperature. If you're looking for more automation in milk steaming, the Breville Barista Touch Impress Review covers a machine that simplifies the process while maintaining high-quality results.
Preparing Your Milk for Steaming on the Breville Barista Express
Before we get started with the actual steaming process, it’s important to choose the right type of milk. In my experience, whole milk works best for creating a rich, creamy foam. The fat content in whole milk helps to create a smooth texture, which is perfect for lattes and cappuccinos. However, if you prefer a dairy-free alternative, options like oat milk or almond milk can also work well, though the texture may differ slightly.
To prepare your milk:
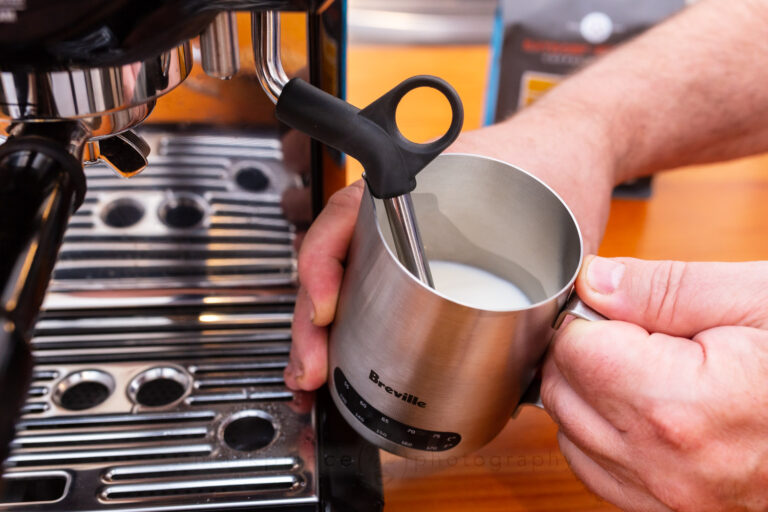
- Pour the desired amount into a milk jug (about 6 ounces for a cappuccino).
- Avoid overfilling the jug since milk expands while steaming.
- Leave enough room for the milk to froth and foam without overflowing.
If you're deciding between different Breville espresso machines, check out the Breville Barista Express Impress vs Pro comparison to see which machine best suits your milk-steaming needs.
How to Steam Milk on the Breville Barista Express: Step-by-Step Guide
Now that the milk is prepped, it’s time to start steaming. Follow these steps to steam milk on the Breville Barista Express like a pro.
1. Turn on the Breville Barista Express and Wait for It to Heat Up
Before steaming milk, ensure your Breville Barista Express is fully heated. Turn the machine on and let it reach the appropriate temperature. This typically takes a few minutes, and you’ll notice the "Ready" light come on when the machine is ready for use.
2. Position the Steam Wand
While waiting for the machine to heat up, it’s a good time to position the steam wand. Make sure the steam wand is clean and free of any milk residue from previous use. Attach the milk jug securely underneath the steam wand. I usually angle the jug slightly to the side so that the steam wand is immersed in the milk at a slight angle. This helps create the ideal vortex for frothing.
3. Activate the Steam Function
Once the machine is ready, activate the steam function by turning the steam dial on the Breville Barista Express. The steam will begin to flow from the wand. At this point, you should hear a gentle hiss as the steam starts to froth the milk.
4. Submerge the Steam Wand Into the Milk
Slowly submerge the tip of the steam wand into the milk. Start with the wand just below the surface of the milk to introduce air. This is when the magic happens – the introduction of air is what creates the microfoam, which gives your coffee drinks their smooth texture.
5. Froth the Milk
As you steam the milk, gradually lower the jug to allow the steam wand to move deeper into the milk. The key here is to maintain a balance between frothing and heating. You want to create a silky microfoam, not just a big, airy foam. Keep the steam wand positioned at the right depth to ensure the milk spins in a circular motion. This will help create uniform froth.
As you continue, you’ll notice the milk expanding and becoming frothy. It’s crucial to monitor the temperature during this process. Monitor the temperature—150°F (65°C) is ideal. If you're interested in a more powerful steaming system, the Breville Dual Boiler BES920XL Review highlights a machine that provides professional-grade steaming.
6. Stop Steaming and Wipe Down the Steam Wand
Once your milk has reached the desired texture and temperature, turn off the steam and remove the jug. Immediately turn the steam dial off to stop the flow of steam. This is an important step as it prevents any milk from getting stuck inside the wand, which could cause clogging or bacteria growth.
Be sure to wipe down the steam wand with a damp cloth to keep it clean. I also recommend purging the steam wand by briefly activating the steam function for a second or two to clear any residual milk from inside.
Troubleshooting Common Issues When Steaming Milk on the Breville Barista Express
While steaming milk on the Breville Barista Express is relatively easy, there are a few common issues you might encounter. Here are some solutions to help you troubleshoot:
- Not Enough Foam: If you’re not getting enough foam, try adjusting the steam wand depth. Make sure it’s just below the surface of the milk, so it can introduce air. Additionally, check that the milk is fresh, as older milk may not froth as well.
- Too Much Foam: If you end up with a large volume of foam that’s too airy, you may have had the steam wand too close to the surface of the milk for too long. Try lowering the jug slightly to submerge the wand deeper into the milk for a smoother texture.
- Milk Scalding: If the milk becomes too hot or starts to scald, it could affect the flavor. Be sure to stop steaming as soon as the jug feels too hot to touch. You can use a thermometer to monitor the temperature for more accuracy.
For a more advanced steaming experience, compare Breville Barista Pro vs Express to see which machine aligns better with your milk-frothing preferences.
Why Steaming Milk on the Breville Barista Express Makes a Difference
One of the reasons I love using the Breville Barista Express to steam milk is because it consistently delivers great results. The steam pressure is just right, and the wand is powerful enough to create a fine microfoam. This means that every time I use it, I can achieve professional-quality milk foam, whether I’m making a cappuccino, latte, or flat white.
Another great thing about the Breville Barista Express is its consistency. With a little practice, you can replicate the same frothing technique each time, ensuring that your drinks taste as good as they look. The ability to control the texture and temperature of the milk allows me to customize my drinks to perfection.
For those interested in comparing Breville’s premium models, the Breville Oracle vs Oracle Touch breakdown explains how higher-end machines take automatic milk texturing to the next level.
Enhancing Your Steamed Milk Experience with Different Techniques
While the basic method of steaming milk on the Breville Barista Express is straightforward, there are some techniques you can experiment with to take your coffee drinks to the next level:
- Latte Art: Once you’ve mastered steaming milk, you can try your hand at latte art. By adjusting the texture of the foam and pouring it carefully, you can create beautiful designs like hearts, rosettas, and tulips. Latte art is an enjoyable skill to learn and adds a professional touch to your drinks.
- Texturing Milk for Different Drinks: Not all coffee drinks require the same type of milk texture. For a cappuccino, you want thicker, more voluminous foam, while for a latte, you prefer a smoother, creamier texture. Experiment with different steaming techniques to create the perfect texture for each drink.

Conclusion: Enjoy Perfectly Steamed Milk on the Breville Barista Express
Steaming milk on the Breville Barista Express is an easy and enjoyable process that opens up a world of coffee possibilities. With its powerful steam wand and user-friendly design, it’s the perfect machine for creating barista-quality drinks at home. Whether you’re making a latte, cappuccino, or flat white, following the steps I’ve outlined will help you achieve perfectly steamed milk every time.
With a little practice, you’ll soon be able to steam milk like a pro, creating delicious, creamy, and smooth drinks that rival those from your favorite coffee shop. Enjoy experimenting with different textures and temperatures, and most importantly, have fun with the process!
Frequently Asked Questions (FAQ)
Q: How do I know when the milk is steamed correctly?
A: The ideal temperature for steamed milk is around 150°F (65°C). You can check this by feeling the side of the milk jug—when it becomes too hot to touch, it's usually a sign the milk is at the right temperature. Additionally, the milk should have a smooth, velvety texture with microfoam, not large bubbles or airy foam.
Q: Can I use non-dairy milk to steam on the Breville Barista Express?
A: Yes, you can use non-dairy milk such as oat milk, almond milk, or soy milk with the Breville Barista Express. However, be aware that these alternatives may not froth exactly like whole milk due to differences in fat content. Oat milk generally performs well, creating a creamy texture similar to dairy milk.
Q: Why isn’t my milk frothing properly?
A: If your milk isn’t frothing properly, there could be a few reasons. Ensure the steam wand is positioned just below the milk's surface to introduce air. Additionally, using fresh milk is crucial, as older milk may not froth as well. Lastly, check that the steam pressure is strong enough by turning the steam dial to the correct setting.
Q: How do I prevent milk from burning or scalding when steaming?
A: To prevent burning or scalding, monitor the milk’s temperature carefully. Once the milk becomes too hot to touch, stop steaming. A thermometer can help you maintain the ideal temperature of 150°F (65°C). Also, avoid leaving the steam wand in the milk for too long as this can cause it to overheat.
Q: How can I make latte art with the Breville Barista Express?
A: Once you have mastered the technique of steaming milk to a silky smooth microfoam, you can begin practicing latte art. Pour the steamed milk slowly into the espresso, starting from the center, then gradually move outward to create designs. With consistent practice, you can perfect designs like hearts, rosettas, or tulips.
Q: What’s the difference between manual and automatic milk frothing on the Breville Barista Express?
A: The manual steam wand allows you to have complete control over the milk’s texture and temperature, which is ideal for those looking to refine their technique. The automatic milk frothing function is more convenient for beginners, as it automatically froths the milk to a certain consistency.